Step 2.
Now you have all the pieces in your pack, it’s time to start the build!
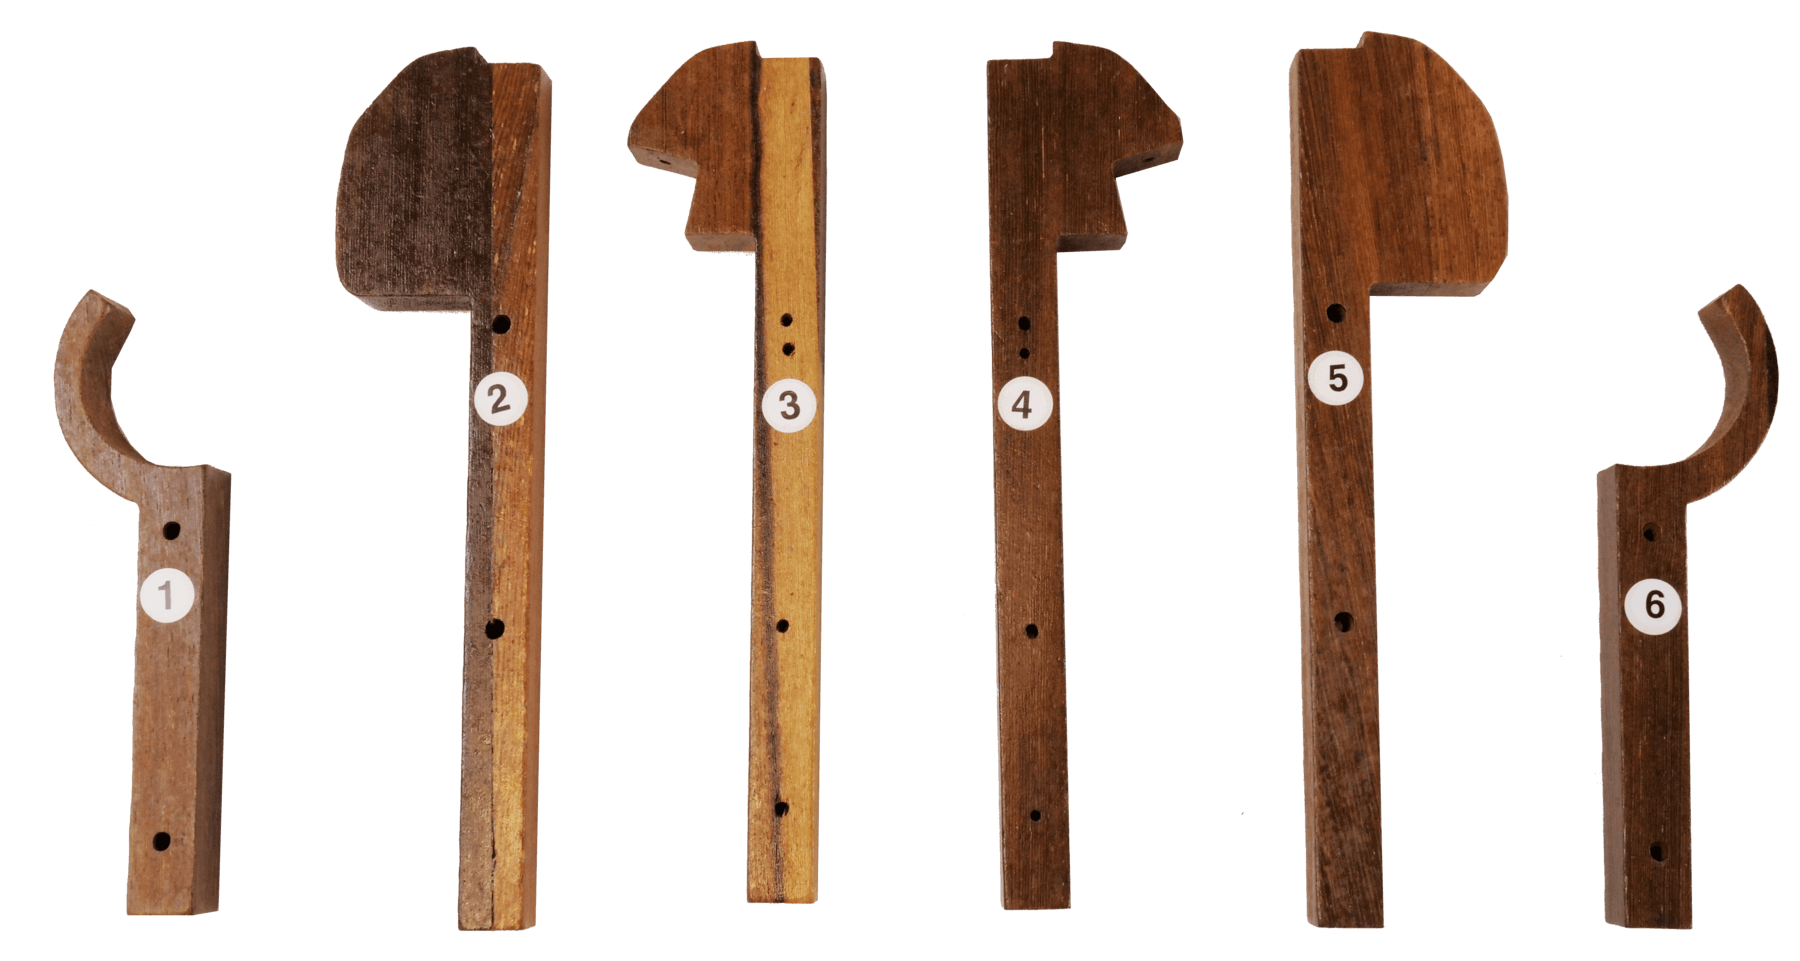
Identify the chassis pieces labelled 1, 2, 3, 4, 5 and 6.
Lay chassis pieces on the table in ascending order, as seen in the below image.
Identify the chassis pieces labelled 1, 2, 3, 4, 5 and 6.
Lay chassis pieces on the table in ascending order, as seen in the below image.
Safety first! Please be careful when using the tools to assemble your toy. If you would like to wear protective gloves, we can provide these! Just ask a member of the facilitating team.

Now, group together chassis pieces 1, 2 and 3.
These are highlighted in the image below:

When you are assembling the toy car, please ensure that the countersunk holes are always left facing outwards (away from the car and towards the team member building that section of the car).

Time to screw chassis pieces 1, 2 and 3 together
Use two ‘L’ sized screws, and the screwdriver, to connect the first three chassis pieces.
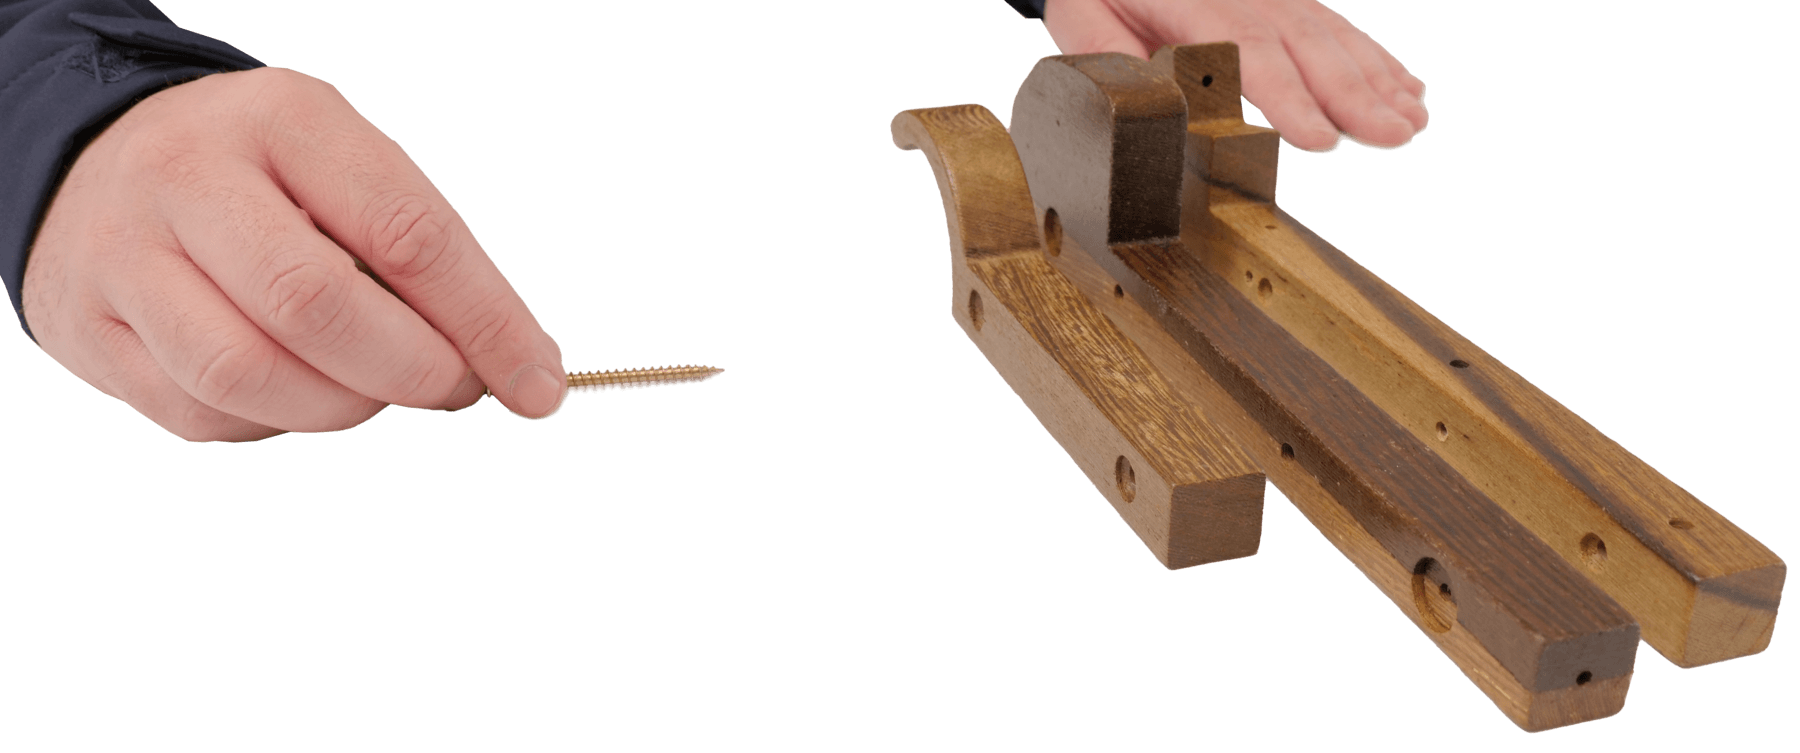
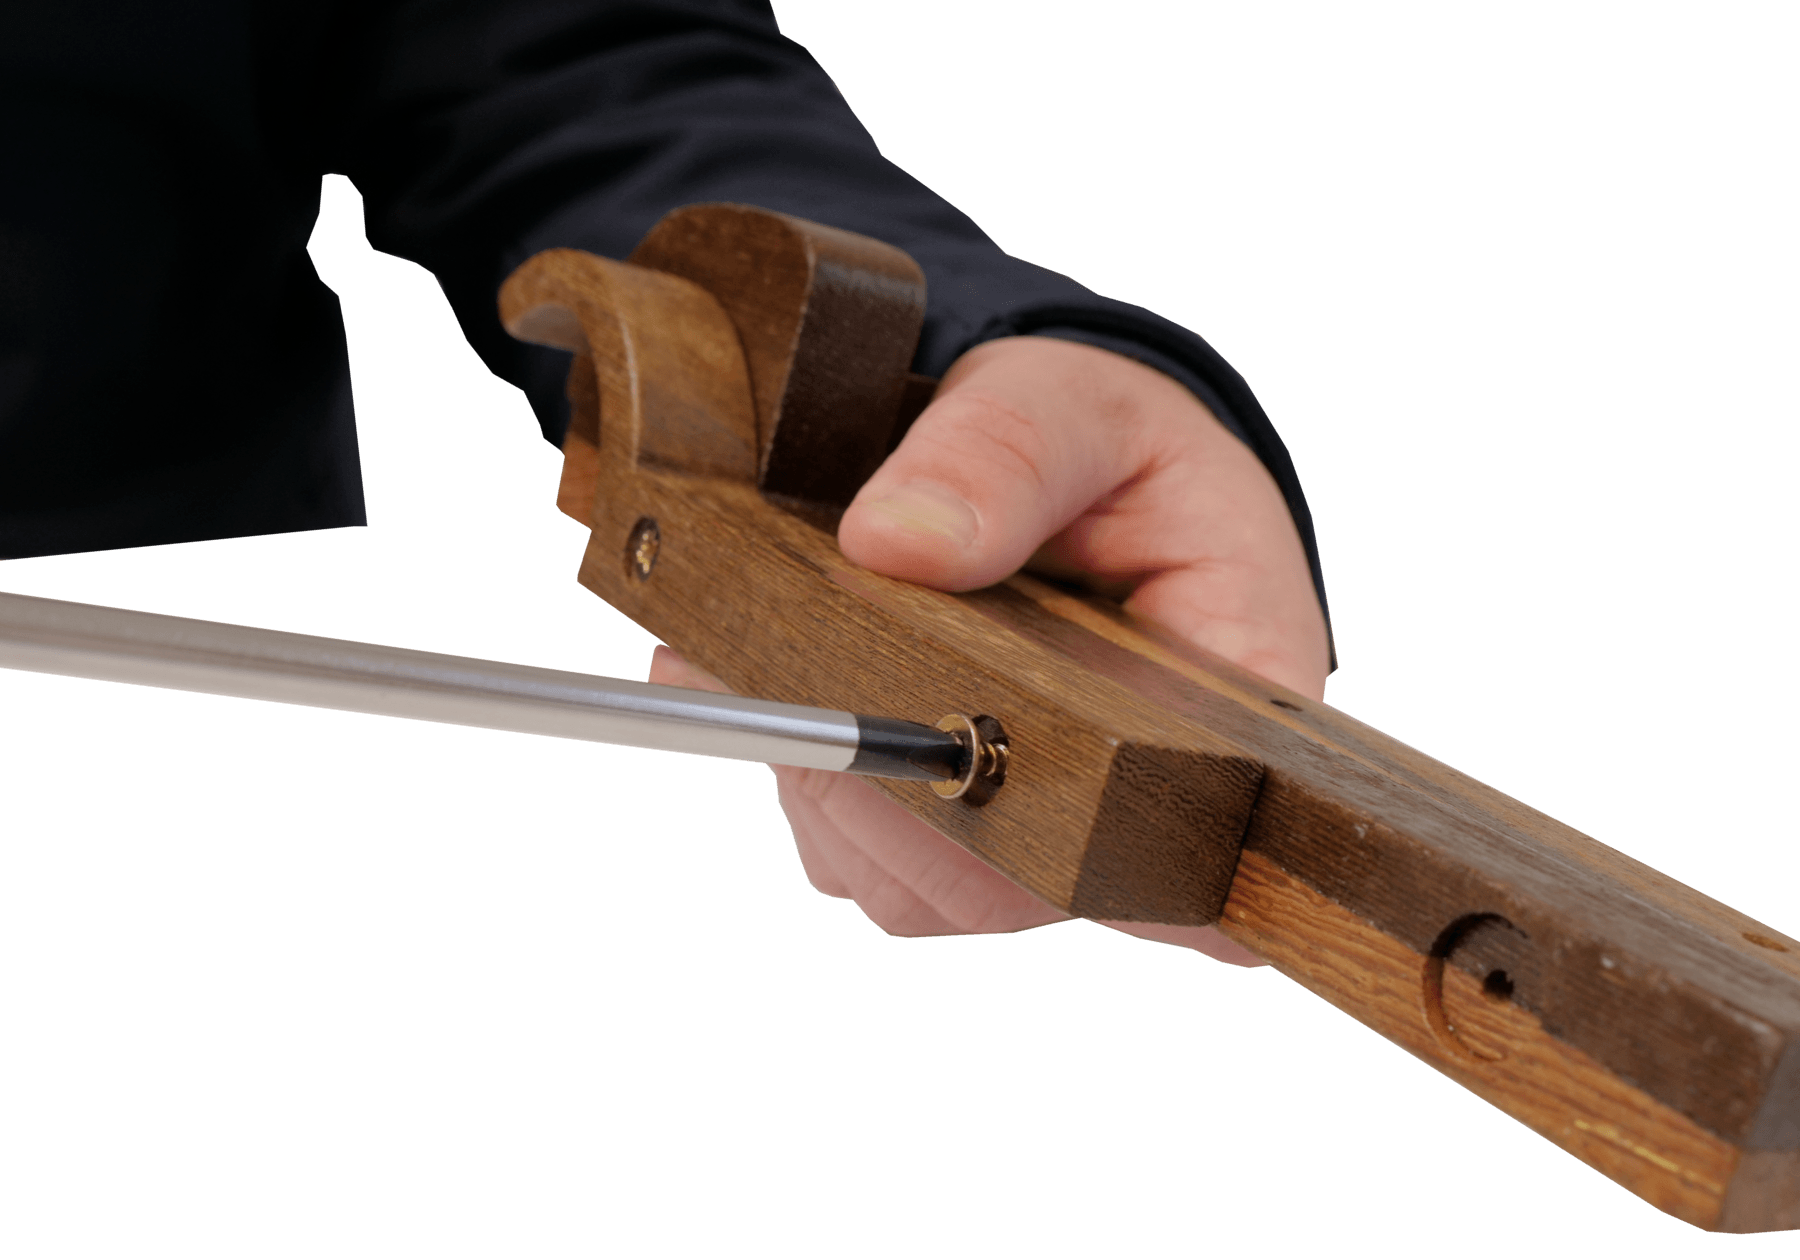
Make sure that chassis pieces ‘2’ and ‘3’ are flush, and that the wheel arch is situated at the rear of the car.